Set up SSO with OpenID Connect
Connect an OpenID Connect identity provider: the values to exchange, the test sign-in, and how to enable it.
Last updated 11 days ago
Part of Single sign-on (SSO) for your workspace — step 2 of 3.
OpenID Connect is the quickest way to connect an identity provider to Tinct: three values to paste here, one address to register there. Okta, Microsoft Entra ID, Google Workspace and most modern providers speak it.
You must be an admin of the workspace, and the workspace must be entitled to single sign-on. If your provider only offers SAML, see Set up SSO with SAML 2.0 instead.
Before you start
- Verify at least one email domain — Verify your email domain. You can describe the connection first, but you cannot enable it until a domain is verified.
- Have an account on your identity provider that lets you create an application, and an account on a verified domain to run the test sign-in with.
1. Create the application on your provider
Create an OpenID Connect application (a web application, with the authorization code flow) and release the openid, profile and email scopes to it. Keep its client ID and client secret: you will paste them into Tinct. Leave the redirect URI aside for now — Tinct issues it in step 3.
What the three values Tinct asks for are called on the common providers:
- Issuer: on Okta, your Okta domain, or the authorization server's issuer; on Microsoft Entra ID,
https://login.microsoftonline.com/<tenant id>/v2.0; on Google Workspace,https://accounts.google.com. - Client ID: Client ID on Okta and Google Workspace, Application (client) ID on Microsoft Entra ID.
- Client secret: Client secret on all three; on Microsoft Entra ID, the secret's value, not its ID.
Step by step on a given provider: Set up SSO with Keycloak, Set up SSO with Amazon Cognito, Set up SSO with Google Workspace, Set up SSO with Okta, Set up SSO with Microsoft Entra ID.
2. Describe the provider in Tinct
- Go to Settings → Security, to the Identity provider card.
- Under Protocol, keep OpenID Connect.
- Fill in Issuer, Client ID and Client secret, then click Save identity provider.
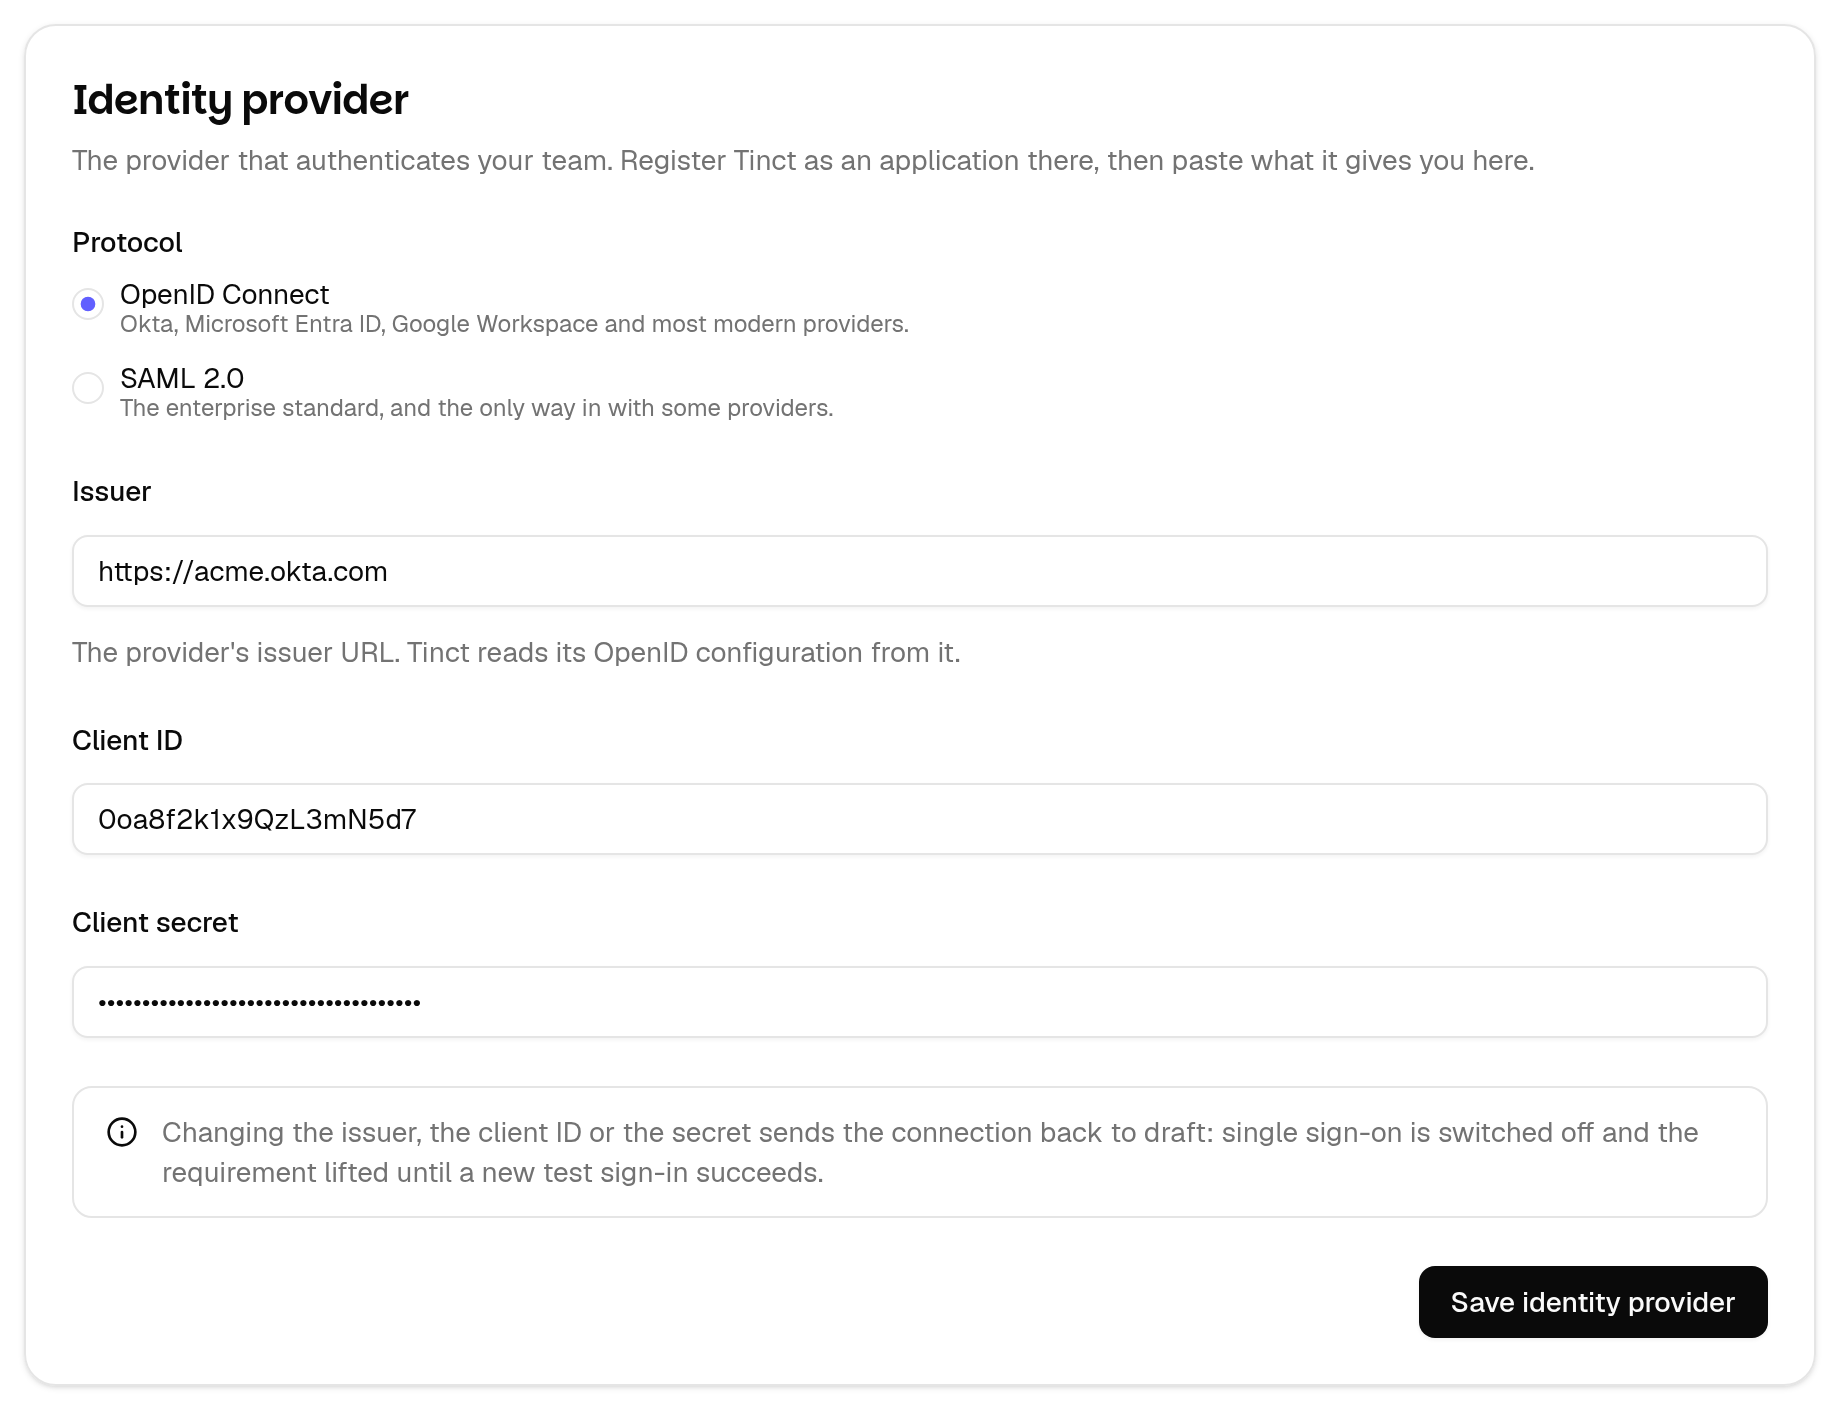
Tinct reads the provider's OpenID configuration from the issuer — the document published at /.well-known/openid-configuration — so the issuer must be an https address reachable from the internet, and that document must announce exactly the issuer you registered.
3. Register the redirect URI
Once the connection is saved, the card shows a Redirect URI. Copy it and register it on your provider's side as the redirect (callback) URI of the Tinct application.
💡 The redirect URI carries the connection's identifier, so it only exists once the connection is saved. Save first, then paste it back into your provider.
4. Test the sign-in
- In the Status card, click Test sign-in. A pop-up opens on your provider.
- Sign in with an account whose address is on one of your verified domains.
- The pop-up shows What Tinct received: the email address, whether your provider says it is verified, and the first and last name. Nothing else is read — no group, no role.
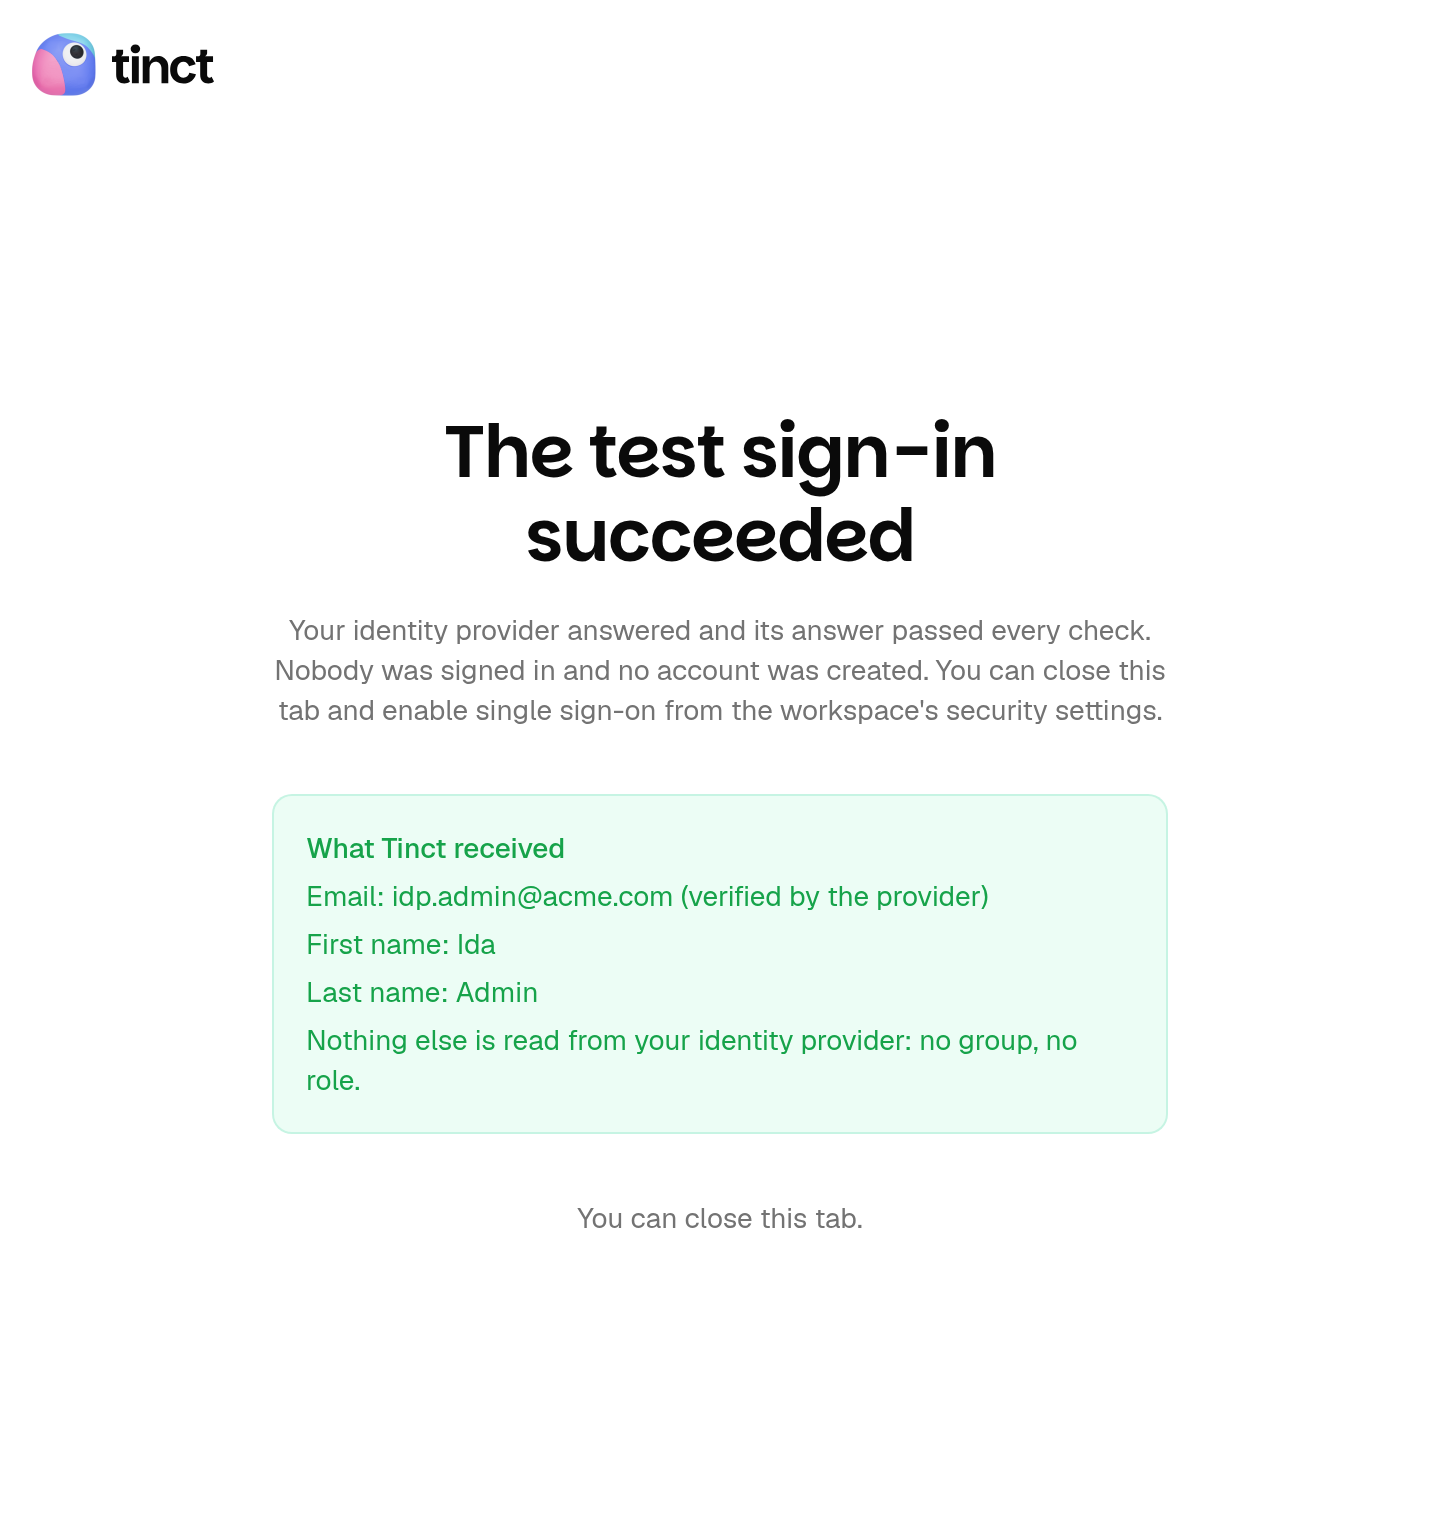
The test signs nobody in and creates nobody. The link works once and for ten minutes; ask for a new one if you need to test again. If your browser blocks the pop-up, allow pop-ups for the site and start the test again.
When it succeeds, the Test sign-in succeeded step is ticked.
5. Enable it
In the Status card, click Enable. Addresses on your verified domains are now sent to your identity provider by default — and their password and social sign-in still work, so a mistake locks nobody out.
When you are confident, go on to Require SSO in your workspace.
What a sign-in grants
The Provisioning card decides what people get when they sign in through your provider:
- Role of new members — Editor or Viewer. Admins are always appointed by hand: single sign-on never grants that role.
- Session length — 8 hours, 24 hours, 3 days or 7 days. After it, people authenticate with your provider again, silently while their session there is still open.
- Create accounts at first sign-in — on, anybody on a verified domain gets an account and a membership at their first sign-in. Off, only people you invited can come in through the connection, and nobody else is created.
If something goes wrong
The test result page names what failed. The common ones:
- The issuer could not be used. It must be an
httpsaddress reachable from the internet, and its discovery document must announce exactly the issuer you registered. - The provider refused the request or the code exchange. Check the client ID, the client secret, the redirect URI registered on its side, and that your account is assigned to the application.
- No email address was sent. Make sure the application releases the email claim — scopes
openid,profile,email. - The address is not on a verified domain. Verify that domain first, or test with an account on one that is verified.
- The answer failed validation. The identity token must be signed with an asymmetric algorithm by a key the issuer publishes, be issued for your client ID by the registered issuer, be current, and carry the value Tinct sent.
💡 Changing the issuer or the client ID sends the connection back to draft: single sign-on is switched off and the requirement lifted until a new test sign-in succeeds, and everyone binds to the provider again at their next sign-in.
Renew the client secret
A new client secret changes nothing for anybody: the connection keeps its status. Create the new secret on your provider while the old one still works, paste it here and save, run Test sign-in to check it, then delete the old secret on your provider. A mistyped secret makes sign-ins fail until it is corrected, which the test shows at once.
Was this helpful?
Still need help? Share an idea